
DIY Tracing Projector: How to Make One at Home Easily
Does a diy tracing projector really work?
A diy tracing projector works by using simple light and reflection to project images onto a surface, making it easy for kids to trace and draw. This diy tracing projector helps improve creativity, focus, and fine motor skills while offering a fun way to reduce kids screen time indoors.
DIY Tracing Projector: How to Make One at Home Easily
A diy tracing projector is one of the easiest ways to turn everyday materials into a fun creative tool at home. This simple diy projector for tracing helps spark imagination while giving children need screen free entertainment ideas that actually work. If you're wondering how to reduce kids screen time indoors without constant supervision, this clever setup keeps them focused, learning, and engaged for longer—ready to see how surprisingly simple it is?
⏱ 8 min read
Ever feel like your child jumps from one screen to another, leaving you searching for something that actually holds their attention?
You're not alone. Many parents want activities that are fun, creative, and don’t rely on devices.
A diy tracing projector might be the simple answer you’ve been looking for.
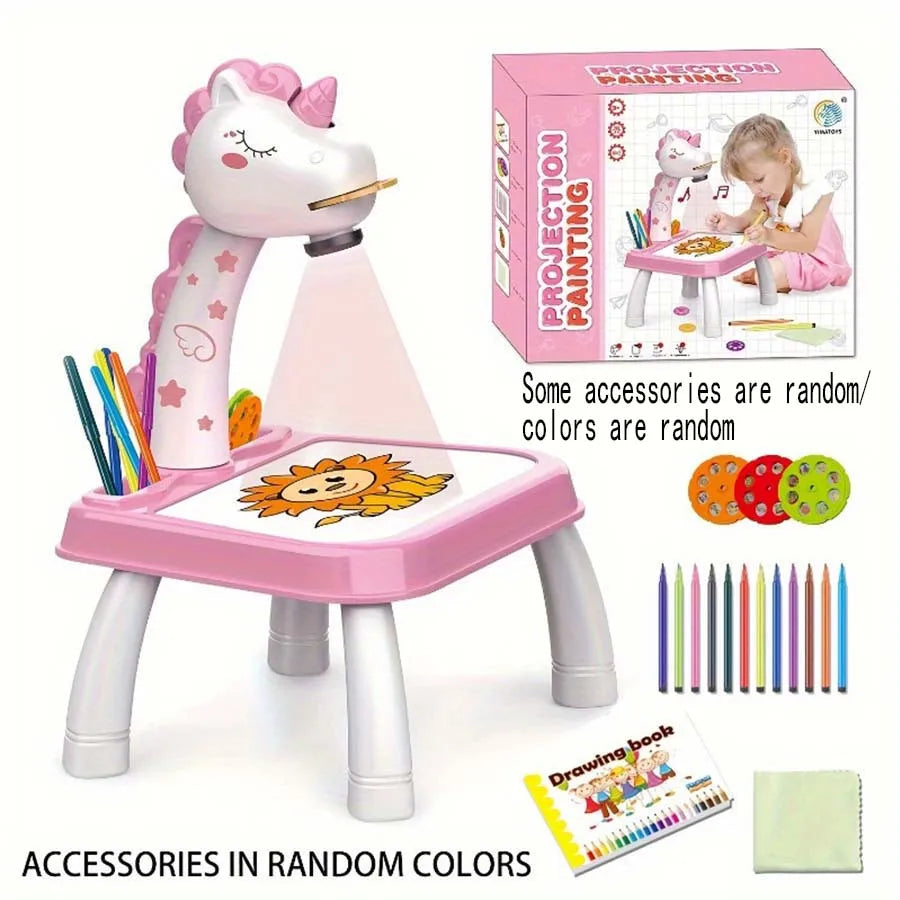
diy tracing projector setup at home 💡 See it in action
What Is a DIY Tracing Projector and Why Parents Love It
A diy tracing projector is a simple homemade device that uses light to project an image onto paper so kids can trace it easily. It turns drawing into a guided activity, helping children build confidence while keeping them engaged without screens.
Parents love it because it solves multiple challenges at once:
- Reduces reliance on tablets and TV
- Encourages creative play
- Improves hand-eye coordination
- Keeps kids focused longer
It’s not just art—it’s a calm, structured activity that fits perfectly into daily routines.
Why Kids Love This Screen-Free Activity More Than You Expect
Kids naturally enjoy activities where they can see instant results—and tracing delivers exactly that.
- They feel successful quickly
- No frustration from “not knowing how to draw”
- They can trace favorite characters or shapes
- It feels like a fun “project” instead of a task
Many parents report their children staying engaged for 20–40 minutes without asking for a screen.
How to Make a DIY Tracing Projector Step-by-Step
Creating your own diy projector for tracing is easier than you think.
-
Find a sturdy box
Use a shoebox or small cardboard box. -
Cut a square opening
This will hold your transparent sheet or phone. -
Add a clear plastic sheet
Use it as your tracing surface. -
Place a light source inside
A flashlight or phone light works well. -
Position your image
Place printed or digital images above the light. -
Adjust angle and distance
Project onto paper and start tracing.
Materials You Already Have at Home
You don’t need expensive tools. Most items are already in your house:
| Item | Purpose |
|---|---|
| Cardboard box | Projector structure |
| Flashlight or phone | Light source |
| Plastic sheet | Projection surface |
| Tape | Stabilizing parts |
| Printed images | Tracing templates |
This makes it a perfect last-minute activity for busy days.
Tips to Get the Best Projection Results Every Time
Small adjustments can make a big difference.
- Use a dark room for clearer projection
- Keep the light steady to avoid blurry images
- Use bold images with clear outlines
- Adjust distance to control image size
Pro tip: If the image looks faint, move the light source closer.
diy projector for tracing in use 💡 See it in action
DIY vs Ready-Made Drawing Projector: Which Is Better?
| Feature | DIY Projector | Drawing Table |
|---|---|---|
| Cost | Very low | Moderate |
| Setup | Manual | Instant |
| Durability | Temporary | Long-lasting |
| Ease for kids | Needs help | Kid-friendly |
| Consistency | Varies | Reliable |
While DIY is great for experimenting, a dedicated tool can make daily use much easier.
How This Helps Reduce Kids Screen Time Indoors
Replacing screen habits is not about removing fun—it’s about offering better alternatives.
This activity works because:
- It feels interactive like a game
- It provides instant visual feedback
- It builds real skills
- It can be repeated with new images daily
Parents often notice fewer “Can I use the tablet?” requests within a week.
For more daily routines that support balanced habits, explore Health & Safety.
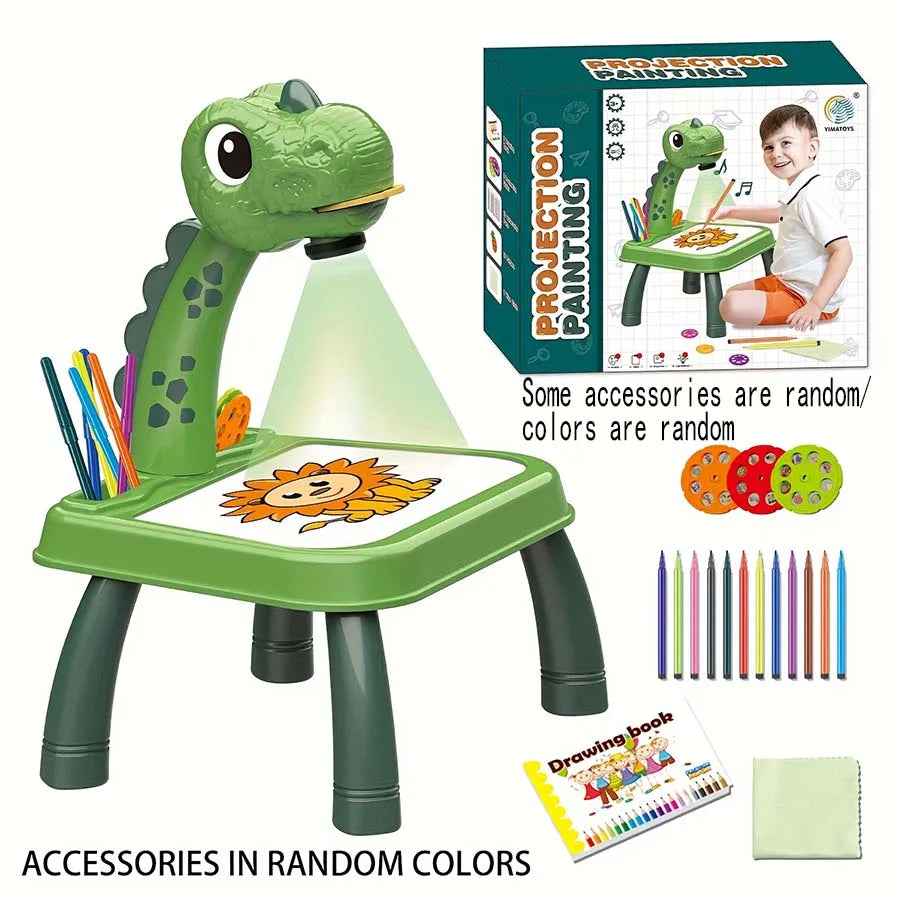
When to Upgrade to a Kids Projection Drawing Table
If your child loves tracing, upgrading can make the experience smoother and more consistent.
A dedicated drawing table offers:
- Stable projection without setup time
- Built-in image templates
- Better lighting for clearer tracing
- Designed specifically for kids
Many parents switch after seeing how often their child uses the DIY version.
Real parent feedback:
- “My son went from 10 minutes to 45 minutes of focused play.”
- “No more daily setup—it’s always ready.”
- “Way less screen time arguments.”
homemade projector upgraded experience 💡 See it in action
FAQs
1. What age is a diy tracing projector suitable for?
Answer: A diy tracing projector works best for kids aged 3 to 10. Younger children may need help setting it up, while older kids can use it independently to practice drawing and improve creativity.
2. Is a diy projector for tracing safe for kids?
Answer: Yes, it’s safe when using low-heat light sources like LED flashlights. Avoid strong bulbs and ensure all parts are securely assembled to prevent tipping or overheating.
3. How often should kids use tracing activities?
Answer: 20–40 minutes per session is ideal. Regular use helps improve focus and drawing skills while providing a healthy alternative to screens without overwhelming the child.
Pillar Article: How to Draw Step by Step: Easy Guide for Kids
Other Related Articles:
- How to Develop Fine Motor Skills with Fun Drawing Games
- Tracing Shapes Preschool: How to Teach Without Stress
- Drawing Activities for Preschoolers: 7 Easy Ways to Start
Explore More:


