
Sanitary Baby Bottle Concerns Explained: Solutions for Every Feeding Routine
⏱ 12 min read
Do sanitary baby bottle concerns really affect my baby's health?
Yes — sanitary baby bottle concerns matter because residue, improper drying, and inconsistent use of a bottle cleaner and sanitizer can introduce bacteria or mold that increase infection risk. Simple, repeatable routines—thorough washing, effective sanitizing, and correct storage—cut contamination dramatically and keep feeding safe and predictable.
Worried that your careful feeding routine might still be leaving invisible risks? Many new parents feel anxious about hidden germs, sticky residue, or a sanitizer that doesn’t do the job — especially during late-night feeds or when traveling. This guide answers the most common sanitary baby bottle concerns and shows practical, tested solutions you can use with any schedule: breastfed, formula-fed, pumped, or mixed. Which small habit will give you the biggest peace-of-mind today?
Learn simple swaps that save minutes and reduce worry.
sanitary baby bottle concerns, bottle cleaner and sanitizer — 💡 See it in action
Why sanitary baby bottle concerns matter right now
Primary concern: tiny lapses in cleaning let bacteria or mold grow in crevices — especially on nipples, threading, and vent systems. Babies have developing immune systems; reducing exposure to contaminants lowers upset tummies, ear infections, and other avoidable problems.
Does cleaning really reduce risk?
Yes. Regular use of a good bottle cleaner and sanitizer, combined with drying and correct storage, reduces detectable microbes by a large margin. A short, consistent routine—clean right after use, sanitize daily or when your baby is under six months, and store bottles dry—delivers measurable protection and calmer parents.
Present the solution early: Fast cleaning routines tailored to your feeding pattern
Here are quick, practical routines you can start today. Pick one that matches your feeding schedule and equipment.
For exclusively breastfed babies
- Rinse pump parts and bottles immediately after use with warm water.
- Use a soft bottle brush and mild detergent (bottle cleaner) to clean hard-to-reach areas.
- Air-dry on a clean rack; sanitize only weekly unless illness occurs.
For formula-fed babies
- Disassemble bottles and wash within an hour of feeding to prevent residue from setting.
- Sanitize nipples and rings daily for babies under 3 months or with low immunity.
- Store assembled bottles with caps off to prevent moisture trapping.
For mixed feeding and pumped milk users
- Keep a dedicated bottle cleaning kit near your pump station.
- Sanitize pump parts and bottles after each day of use; rinse after every session.
- Label and rotate bottles to ensure none sit too long in storage.
Actionable guidance for picking a bottle cleaning kit that fits your routine.
How to choose a bottle cleaner and sanitizer: quick comparison
Not all cleaners or sanitizers are created equal. Match the tool to how you live — countertop space, travel frequency, and number of bottles.
| Tool | Best for | Pros | Cons |
|---|---|---|---|
| Manual bottle brush + detergent | Minimalists, frequent washers | Cheap, portable, immediate use | Requires thorough technique; missed crevices |
| Electric steam sterilizer | Families at home with multiple bottles | Fast, chemical-free sanitizing | Takes counter space; not travel-friendly |
| UV sanitizers | Busy parents wanting quick dry storage | Dries and sanitizes without boiling | Higher cost; must follow cycle times |
| Sanitizing tablets / cold-water solutions | Travel, daycare drops | Portable, no heat needed | Requires exact dilution and contact time |
Recommendation in one line
If you travel often, a compact bottle cleaning kit with a manual brush plus sanitizing tablets suits you; if you stay primarily at home, consider a countertop sterilizer for reliable daily sanitizing.
How to deep clean and sanitize bottles: full how-to (ordered steps)
- Disassemble all parts: nipple, collar, cap, vent systems, and any silicone inserts.
- Rinse under warm running water to remove visible milk or formula residue.
- Use a dedicated bottle cleaner brush and mild detergent to scrub inside surfaces and nipples; invert nipples to clean inside.
- Rinse thoroughly to remove soap film.
- Sanitize using your chosen method: boiling (5 minutes), steam sterilizer (follow device instructions), UV sanitizer (full cycle), or approved cold-water tablet (specified soak time).
- Air-dry on a clean rack — leave parts unassembled to speed drying and avoid trapped moisture.
- Store sealed in a dry container only after fully dry.
Quick facts: why drying matters
Damp environments let mold and bacteria grow quickly. Even sanitized items can become contaminated if stored wet. Letting parts dry fully before assembly cuts the risk of recontamination dramatically.
On-the-go cleaning: routines for travel and daycare
Travel introduces new challenges: limited water, less drying time, and fewer sanitizing tools. Here’s how to keep bottles safe while mobile.
Compact kit checklist
- Small bottle brush or sponge (travel size)
- Foldable drying mat or clean towel
- Sanitizing tablets or pre-measured sachets
- Zip-locks or a sealed container for dry storage
- Extra nipples and caps (so you can rotate and dry parts)
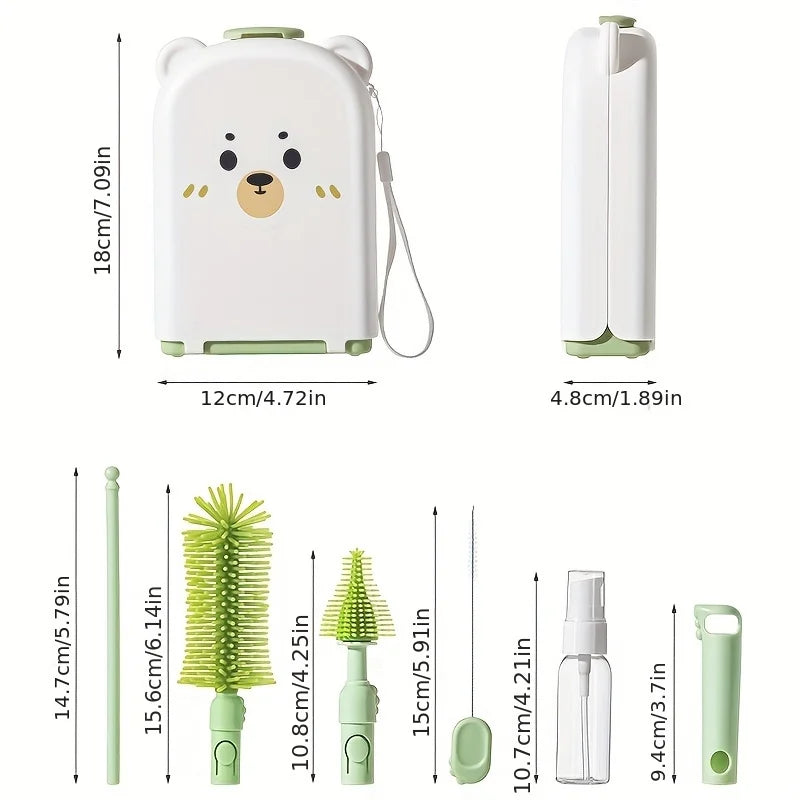
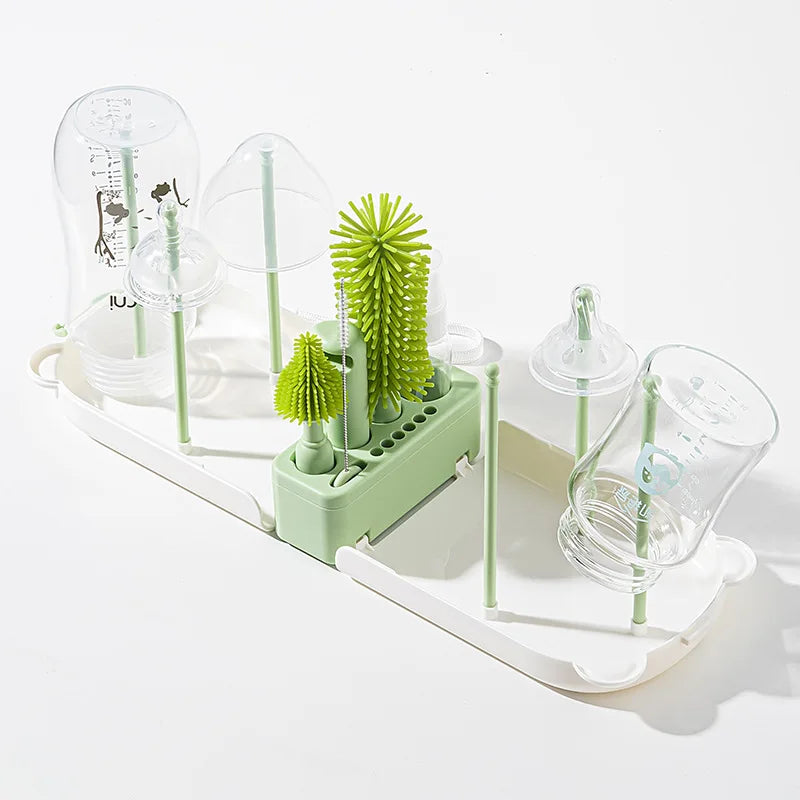
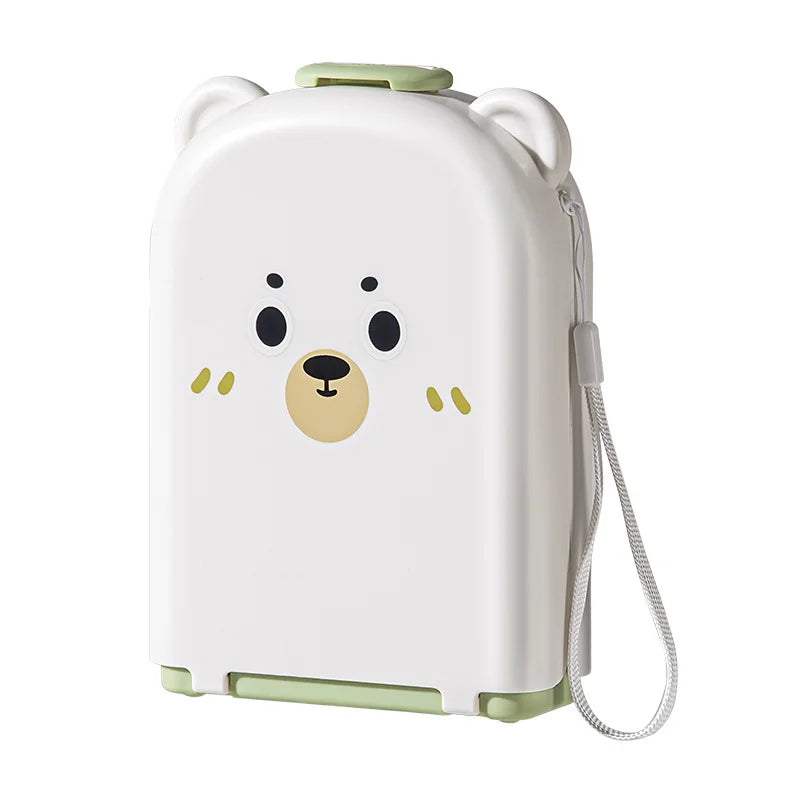
Tip: Keep a travel kit in your diaper bag and another in your car for longer trips. For predictable protection, consider a small foldable kit that pairs well with your pump and bottles — like this Travel Baby Bottle Brush Set.
Common mistakes parents make (and how to fix them)
- Rinsing only: Rinse removes some residue but not fats or proteins. Always scrub with detergent.
- Reassembling too soon: Putting caps on when parts are damp traps moisture; dry first.
- Using dishwashers incorrectly: High-heat cycles often work, but small parts can fall through — use a dishwasher basket.
- Skipping daily sanitizing for newborns: Infants under 3 months or with low immunity benefit from daily sanitizing.
- Over-reliance on “antibacterial” wipes: Wipes may clean surfaces but don’t sanitize internal crevices; not a substitute for proper washing.
Match product benefits to specific needs: which cleaning set is made for you?
Below are common parenting pain points and the product features that solve them.
Need: Fast night feeds with minimal mess
- Look for: Quick-rinse bottles, wide-neck design, and a small brush that fits bottle contours.
- Why: Faster disassembly and easier access reduce time awake and reduce missed residue spots.
Need: Frequent travel and daycare drop-offs
- Look for: A travel-friendly bottle cleaning kit, sanitizing tablets, and extra nipples.
- Why: Lightweight, no-heat sanitizers and portable brushes let you sanitize virtually anywhere.
- Shop options: Feeding & Nursing and Baby Hygiene Gadgets have travel-friendly kits.
Need: Baby with sensitive skin or frequent rashes
- Look for: Fragrance-free detergents, steam sanitizers to avoid chemical residues, and thorough rinsing routines.
- Why: Residual detergent or sanitizer traces can irritate sensitive skin.
- Helpful categories: Health & Safety.
Visual comparisons and decision helpers
Pros / Cons: Sanitizing methods at a glance
| Method | Pros | Cons | Best for |
|---|---|---|---|
| Boiling (5–10 min) | Cheap, accessible | Can warp some plastics; time-consuming | Occasional sanitizing at home |
| Electric steam sterilizer | Fast, chemical-free | Counter space, cost | Daily home use |
| UV sanitizer | Dry storage and sanitizing combined | Expensive; cycle reliance | Busy families wanting one-step |
| Cold-water tablets | Portable, no heat | Need exact contact time | Travel, daycare |
Checklist: Daily vs Weekly tasks
- Daily: Wash with detergent after every feed, rinse, air-dry, sanitize nipples for infants under 3 months.
- Weekly: Deep clean vents, replace old nipples, run a full sterilizer cycle for all parts.
proper bottle cleaning, bottle cleaning kit — 💡 See it in action
Social proof: what real parents say
Short, anonymized quotes from parents who changed habits and saw results.
“Switching to a compact bottle cleaning kit and sanitizing at night cut my baby’s spit-up episodes — I slept better knowing bottles were spotless.” — A.H., first-time parent
“We travel for work. Cold-water sanitizing tablets plus a foldable brush let us keep feeding safe without a kitchen.” — J.M., working parent
“After switching nipples monthly and air-drying parts fully, our pediatrician said our baby’s recurrent ear irritation decreased.” — L.R., mom of two
Product fit: quick mapping (use-case → feature)
| Use case | Key feature to look for | Why it helps |
|---|---|---|
| Night feeds | Wide-neck bottles, fast brush | Easy access reduces missed spots and speeds cleanup |
| Travel/daycare | Portable sanitizers, extra nipples | Quick sanitizing without electricity |
| Sensitive skin | Steam sanitizers, fragrance-free detergents | Removes residue without chemical traces |
Before & after: simple metrics to track at home
Track these small metrics for 2 weeks and you’ll notice improvements:
- Number of feeds before a part needs replacement (nipples, vent membranes).
- Days between noticing residue or odor.
- Frequency of digestive upsets that might correlate with cleaning lapses.
Where to find the right cleaning kits and accessories
Look in categories that match your needs. Examples: Feeding & Nursing for bottle tools, Sterilization Devices for sanitizers, and Baby Hygiene Gadgets for travel-friendly options.
Mini FAQ (schema-ready)
1. How often should I sanitize baby bottles?
Sanitize daily for infants under three months, premature babies, or if someone in the household is ill. For older infants, clean thoroughly after each use and sanitize regularly (e.g., nightly or every few days) depending on usage and risk.
2. Can I use the dishwasher to clean bottles?
Yes, most bottles are dishwasher-safe on the top rack; use a basket for small parts and run a hot cycle. Still scrub nipples and crevices manually when possible to remove trapped residue.
3. Are chemical sanitizers safe?
Approved cold-water sanitizing tablets are safe when used per instructions and rinsed if required. Steam and UV methods avoid chemicals entirely and are good options for sensitive babies.
4. How do I store bottles to keep them sanitary?
Store only once all parts are fully dry. Keep caps off until dry, then store assembled in a clean, covered container if desired to keep dust out.
Ready to make feeding simpler and safer?
Choosing the right bottle cleaning kit and sticking to a short, consistent routine cuts nearly all common sanitary baby bottle concerns. Start with a compact travel brush, a trusted bottle cleaner and sanitizer method that matches your lifestyle, and a habit of drying fully before storage.
Find travel-friendly brushes, sanitizers, and convenient storage options to fit every feeding routine.
Buy Travel Baby Bottle Brush Set
proper bottle cleaning, bottle cleaning kit — 💡 See it in action
Closing: small changes with big relief
Sanitary baby bottle concerns often feel overwhelming, but the solution is routine + the right tools. Prioritize one small habit this week — drying fully, replacing a nipple, or carrying a travel kit — and you’ll notice reduced anxiety and better feeding flow.
How do I know when to replace a nipple?
Replace nipples every 2–3 months or immediately if you see cracking, discoloration, or reduced flow. Frequent use or dishwasher cycles can accelerate wear.
Is there a single best sanitizer?
No single method fits every family. Steam sterilizers are convenient at home, cold-water tablets are excellent for travel, and UV sanitizers combine drying and sanitizing. Choose based on your routine and space.
Can I reuse bottles after an illness in the house?
After household illness, sanitize all bottles and pump parts more frequently (daily) until everyone is symptom-free for 48 hours.
Related Articles:
- PP Baby Nipple Cleaning Tool Uses: Best for Stubborn Residue and Daily Hygiene
- How to Clean Baby Bottles on Travel for Germ-Free Feeding in Any Situation
Pillar Articles:


