
Home Smart Sensors: How to Use Them to Fix Daily Climate Problems
⏱ 8 min read
Does using home smart sensors actually solve everyday temperature and humidity problems?
The short answer: Yes — home smart sensors can continuously monitor temperature and humidity, trigger your thermostat or humidifier, and alert you to sudden changes. With simple placement and rule-based automation, a smart home temperature control system reduces thermostat temperature jumping, stabilizes indoor humidity, and keeps electronics and family comfort balanced.
Are mornings ruined by thermostat temperature jumping or nights interrupted because indoor humidity is too low? Parents and caregivers often worry about baby sleep, dry skin, and unreliable heating. This guide shows practical, step-by-step ways to use home smart sensors and an electronic climate control strategy to make every room consistently comfortable — with easy DIY installs and real-life routines you can adopt tonight.
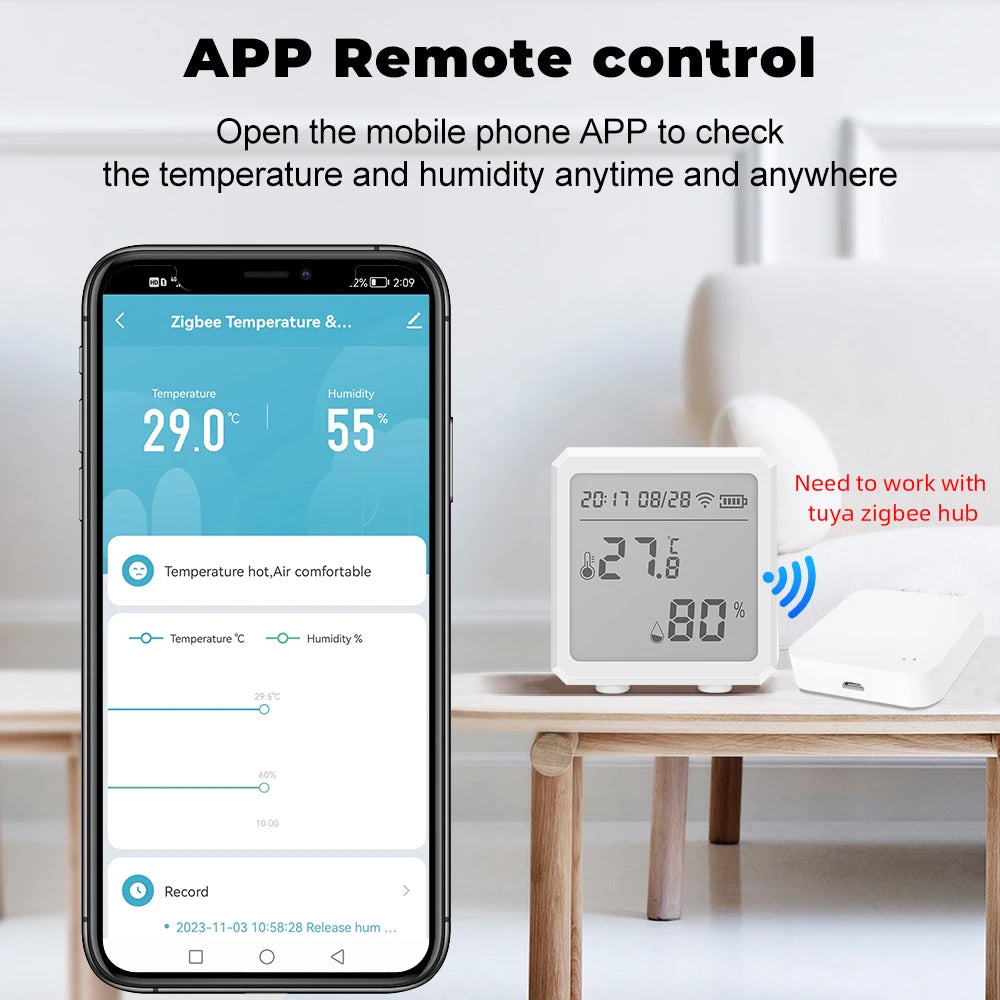
home smart sensors + smart home temperature control system — 💡 See it in action.
Why home smart sensors matter for everyday comfort
Home smart sensors give you continuous data about the rooms that matter most — nursery, living room, and home office. Rather than guessing whether the thermostat is accurate, sensors reveal microclimates (cold corners, hot ceilings) and let you create rules that react to real conditions, not assumptions.
Key benefits
- Prevent thermostat temperature jumping by smoothing control signals.
- Fix “indoor humidity too low” early with automatic humidifier triggers.
- Protect electronics and wood from humidity swings using alerts.
- Improve sleep and comfort by keeping the nursery at steady temps.
Quick setup: get started in 6 steps
Follow these steps to install a basic monitoring loop that talks to your thermostat or humidifier.
- Unbox sensors and place one at adult head-height in rooms you care about.
- Install the companion app and name each sensor clearly (Nursery, Living, Master).
- Pair sensors to your hub or Wi-Fi bridge (Zigbee/Z-Wave or Wi-Fi depending on model).
- Create simple rules: e.g., when Nursery temp < 68°F, set thermostat +2° for 30 min.
- Add humidity rule: if relative humidity < 35%, turn humidifier on for 45 minutes.
- Test with quick temperature/humidity changes and refine placements.
Best placements to fix common problems
Sensor placement matters more than brand. Pick spots that reflect the living space, not drafts.
- Nursery: 3–4 feet above floor at head level; away from windows and vents.
- Living area: center of room on an interior wall; avoid direct sunlight.
- Hallway: use as a baseline reading for whole-home automation decisions.
- Near humidifier: place an extra sensor nearby to avoid overshoot.
Common problem → ideal fix
- Thermostat temperature jumping: Use a network of sensors and average their readings to send fewer, smoother setpoint changes.
- Indoor humidity too low: Set humidity thresholds and timed boosts to avoid rapid on/off cycles.
- Room-to-room inconsistency: Use sensor-based zones or smart vents to balance airflow.
Automation rules that stop thermostat temperature jumping
Direct answer: Using home smart sensors, create an averaged-room or weighted-reading rule so the thermostat receives one stable command instead of reacting to momentary spikes. For example, average three sensors and only adjust if the delta is >1°F for 10 minutes. This reduces short cycling and protects HVAC.
Direct answer (repeated): Home smart sensors help by providing stable, time-buffered input to your electronic climate control. Wait for a sustained change (e.g., 10 minutes) or use hysteresis (e.g., 0.8°F tolerance) before sending new thermostat commands — this prevents frequent setpoint bounce.
Practical rule examples
- Average-and-then-act: Average readings of Nursery, Living, and Hallway; only change thermostat if average shifts by >1°F for 10 minutes.
- Hysteresis rule: If temp drops below 67.5°F, set heat to 69°F; then wait until above 68.5°F to stop — prevents flip-flop.
- Humidity boost: If humidity < 35% for 20 minutes, run humidifier for 40 minutes; then re-evaluate.
smart home temperature control system + indoor humidity too low solutions — 💡 See it in action.
Tools and product recommendations
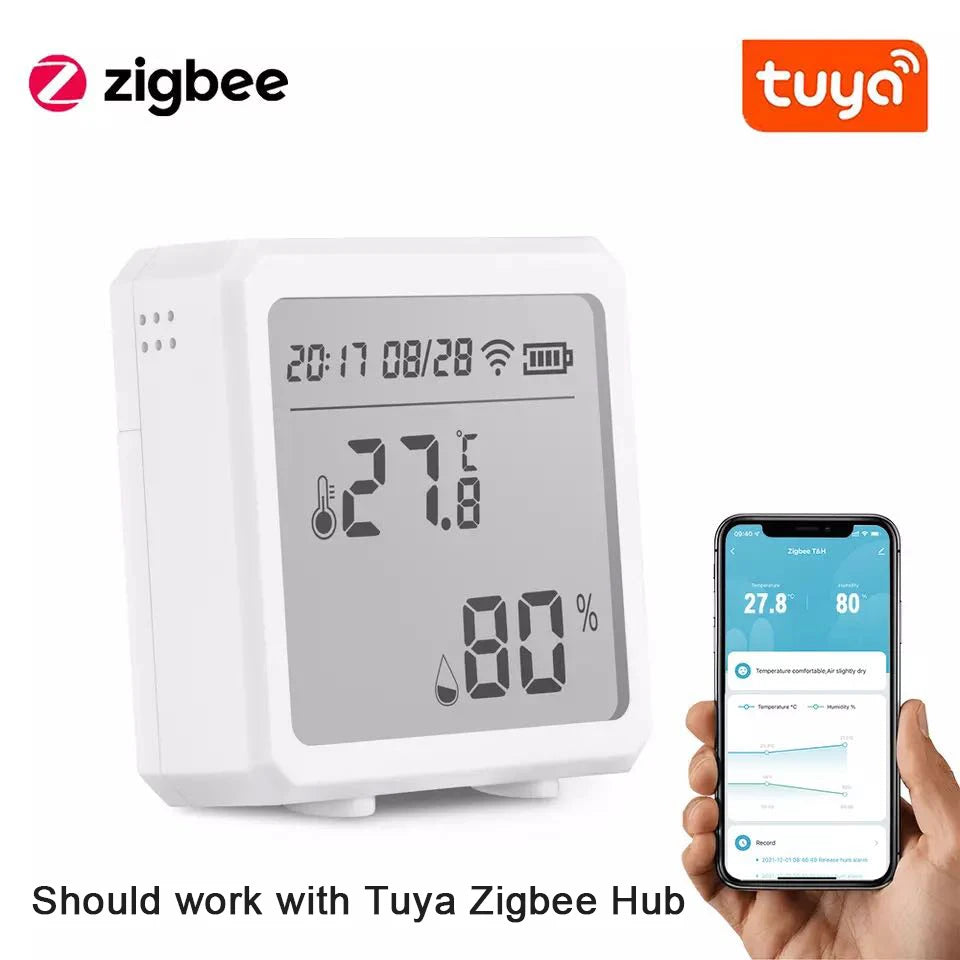
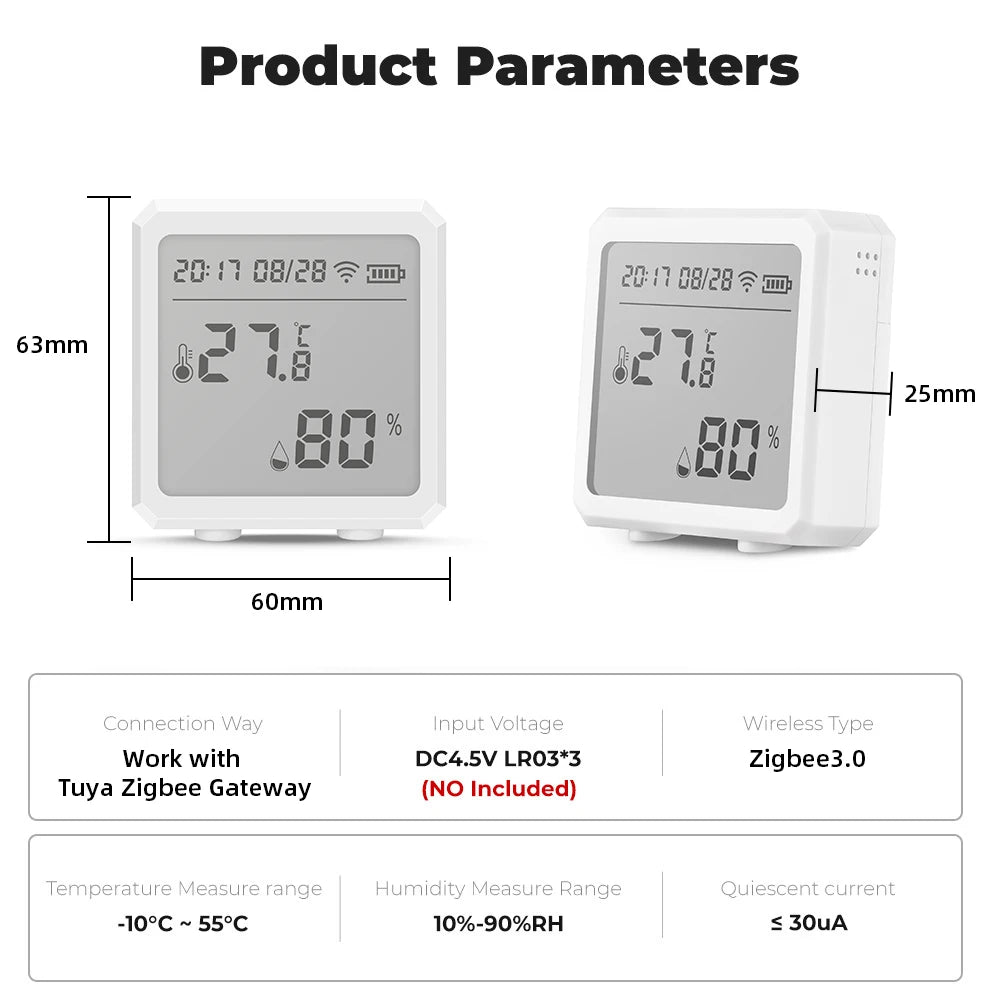
Start with a reliable sensor, a compatible hub/gateway, and a thermostat that supports third-party automation. If you want one-click integration, choose sensors compatible with Zigbee or your chosen voice assistant.
| Component | Why it helps | Use-case |
|---|---|---|
| Multi-room temp & humidity sensor | Accurate local readings for smart rules | Nursery and living area balancing |
| Smart thermostat | Receives refined commands, reduces cycling | Whole-home temperature management |
| Smart humidifier | Automated humidity control | Protect skin and wood furniture |
Want a sensor to try? Check the Zigbee temperature & humidity sensor product here: Zigbee temperature & humidity sensor.
Quick comparison: sensor types
Choose the right protocol for reliability and range.
- Zigbee/Z-Wave: Low power, reliable mesh networking — ideal when you have a hub.
- Wi-Fi: No hub required but higher power use and can be noisy on network.
- Bluetooth: Simple for single-room sensing but limited range.
Pros & cons
| Type | Pros | Cons |
|---|---|---|
| Zigbee | Mesh, low power, lots of devices | Needs hub |
| Wi-Fi | No hub, easy setup | Power hungry, can congest Wi-Fi |
| Bluetooth | Cheap, simple | Short range |
Real-life mini case studies
Case 1 — Thermostat temperature jumping fixed in an older home
Problem: Thermostat in hallway triggered frequently by door drafts. Solution: Added sensors in living room, bedroom, and hallway; automation averaged readings and only adjusted when a sustained change occurred. Result: Reduced HVAC on/off cycles by 40% and more stable room temps at night.
Case 2 — Dry winter air harming wooden crib
Problem: Indoor humidity too low in nursery. Solution: Sensor-triggered humidifier with 45-minute timed boosts and a 30-minute cooldown. Result: Humidity stabilized at 42–45%, baby slept longer, and wood cracking stopped.
Step-by-step: stabilize indoor humidity
Follow this practical routine to fix low-humidity problems in the nursery or living room.
- Place a precise humidity sensor near the area where occupants spend time (about 3–4 feet high).
- Set a target humidity range (40–50% is comfortable for most homes and babies).
- Create an automation: if humidity < 38% for 15 minutes → turn humidifier on for 45 minutes.
- Add a guard rule: if humidifier runtime > 2 hours in 24 hours, send an alert to inspect (prevents overuse).
- Monitor weekly and adjust target window as outdoor humidity changes seasonally.
Visual: quick pros/cons and decision help
| Problem | Smart sensor solution | Why it works |
|---|---|---|
| Thermostat temperature jumping | Average multi-sensor input + hysteresis | Prevents frequent setpoint changes |
| Indoor humidity too low | Timed humidifier boosts | Prevents overshoot and keeps stable RH |
| Room-specific discomfort | Zone rules + smart vents | Directs airflow where needed |
Social proof & quick tips from parents
“After adding two sensors and a single automation rule, our newborn stopped waking cold at night. Worth every minute.” — Sarah, New Jersey
“We cut energy waste by letting sensors decide when to nudge the thermostat — no more manual fiddling.” — Dave, Oregon
Related gear for monitoring and peace of mind: Monitoring Devices, Temperature Tools, and Smart Baby Gadgets.
Installation checklist (printable)
- Sensors labeled and app organized
- Hub connected and firmware updated
- Automation rules tested with manual triggers
- Humidifier/HVAC response checked for 24–48 hours
Mini FAQ
-
How many sensors do I need?
Start with sensors for high-priority rooms: nursery, living room, and a hallway baseline — three sensors cover most households effectively.
-
Will sensors work with my existing thermostat?
Many thermostats accept third-party integrations; check compatibility or use a hub to translate sensor rules into thermostat actions.
-
Can smart sensors prevent mold?
They can help by monitoring humidity and triggering dehumidification or alerts when levels stay high (above ~60%), but they are one part of a larger moisture strategy.
Final tips before you start
- Label sensors clearly in-app (Nursery, Baby Room, Living) so automation is easy to manage.
- Use small delays and averaging to reduce short-cycling of HVAC.
- Combine sensor alerts with push notifications so you can act immediately when something is outside your comfort band.
Using a few well-placed home smart sensors and simple automation rules gives you control over thermostat temperature jumping and indoor humidity too low — with less guesswork and more restful nights. Try the Zigbee temperature & humidity sensor at Zigbee temperature & humidity sensor and start with a single averaged-rule to see rapid improvement.
electronic climate control + efficient home temperature settings — 💡 See it in action.
Mini FAQ (for quick answers)
-
Do sensors need a hub?
Some do (Zigbee/Z-Wave), but Wi-Fi models can connect directly to your router. Hubs often improve reliability.
-
How precise are these sensors?
Good sensors read temp to ±0.5°F and humidity to ±3% RH — accurate enough for comfort automation and safety monitoring.
-
Can I use voice assistants with these sensors?
Yes — many systems work with voice assistants for readouts and simple commands, but keep automation logic in the hub or automation platform for reliability.
Published by KentDO Mom & Baby — practical guides for safer, comfier homes.
Pillar Article: How to Detect Humidity: A Simple Step-by-Step Guide for Accurate Readings
Other Related Articles:
- Protect Sensitive Household Items: How to Keep Moisture Damage Away
- Sensors for Temperature and Humidity: How to Install Them the Right Way
- Monitoring Apps for Android: How to Track Home Climate in Minutes
Explore More:


