
Sensors for Temperature and Humidity: How to Install Them the Right Way
⏱ 7 min read
Does using sensors for temperature and humidity really improve home comfort?
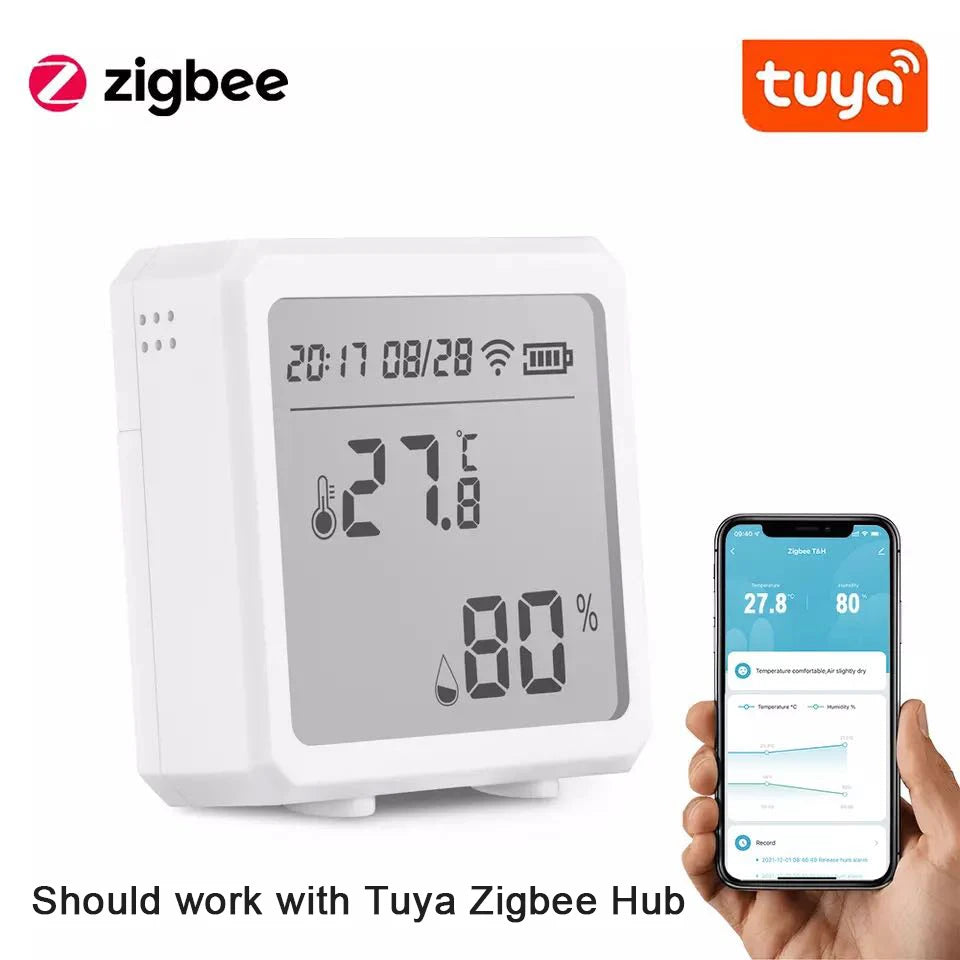
Sensors for temperature and humidity give you accurate, room-by-room data so you can fix chilly nurseries, sweaty closets, or uneven heating. A reliable zigbee temperature and humidity sensor integrates with smart hubs to automate thermostats and dehumidifiers, improving sleep, energy use, and baby-safe comfort in minutes.
Installing sensors for temperature and humidity doesn’t have to be confusing—especially when a zigbee temperature and humidity sensor or a zigbee temp sensor turns DIY smart home sensors into a smarter climate control device upgrade. This guide walks busy parents and DIY-savvy homeowners through choosing, placing, and tuning sensors so your home stays safe, comfortable, and energy-smart.
sensors for temperature and humidity + zigbee temp sensor — 💡 See it in action.
Why install sensors for temperature and humidity?
Short answer: accurate, local measurements help you keep sleeping babies comfortable, avoid mold in damp rooms, and save energy by letting your thermostat act only where it’s needed. Sensors for temperature and humidity are the first step toward a safer, smarter home climate that protects little ones and reduces waste.
How sensors help (short answer)
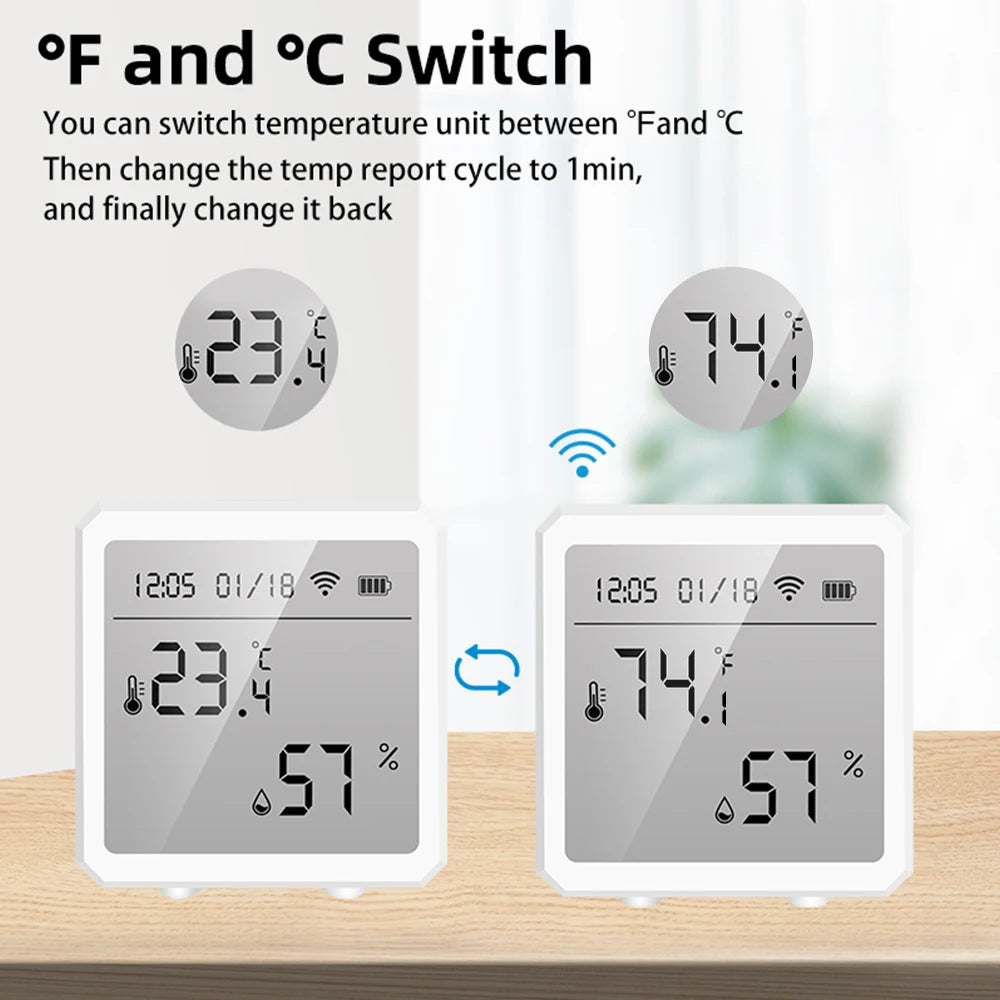
A zigbee temperature and humidity sensor reports precise temp and moisture readings from individual rooms, enabling targeted heating, cooling, and dehumidifying. With a zigbee temp sensor linked to a smart hub, you can automatically adjust a smart climate control device and get alerts if a nursery gets too warm or a closet becomes too damp.
How to choose the right sensor for your home
Choosing the right sensor depends on range, battery life, update frequency, and whether you want local mesh networking (Zigbee) or direct Wi-Fi. For parents who want reliable, low-power operation and easy mesh expansion, a zigbee temperature and humidity sensor is often the easiest upgrade.
- Primary goal: consistent room-level accuracy for nursery, sleep spaces, and storage.
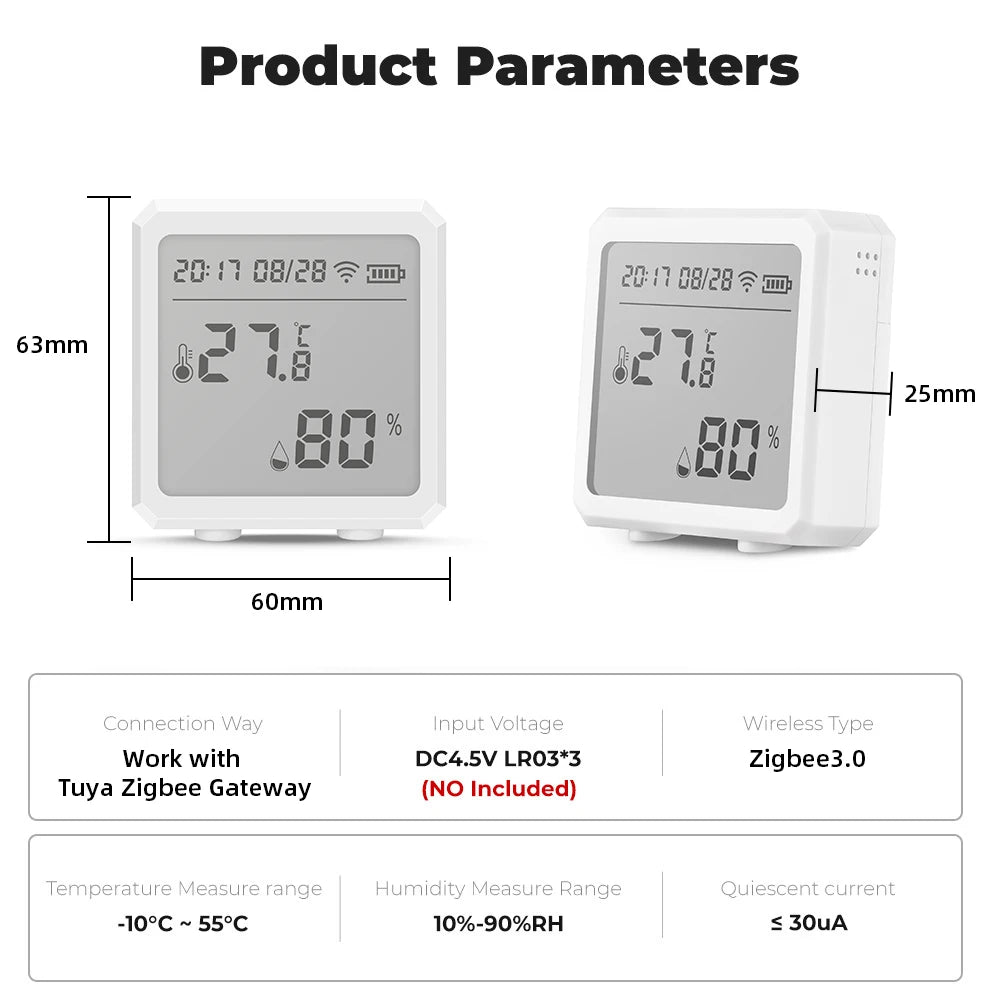
- Connectivity: Zigbee for mesh reliability; Wi-Fi for direct cloud access; BLE for quick local installs.
- Power: coin cell vs AAA vs mains—long battery life reduces maintenance.
- Display & alerts: built-in LCD helps quick checks; push notifications catch spikes.
Looking for a starter model? Check the product page for our recommended sensor at Monitoring Devices use case—see product details and specs to confirm fit.
Comparison at a glance (benefits-first)
| Type | Best for | Pros | Cons |
|---|---|---|---|
| Zigbee | Mesh homes & many sensors | Low power, reliable mesh, long battery life | Needs a hub |
| Wi-Fi | Direct cloud control | No hub, simple cloud access | Higher power use, potential local latency |
| BLE | Quick local setups | Very low power, local control | Short range, fewer integrations |
Step-by-step: where and how to install sensors
Follow these short, practical steps to get consistent readings across rooms.
- Decide the monitoring zones: nursery, master bedroom, hallway, basement, and storage closets. Prioritize where babies sleep and where moisture matters most.
- Mount height: place sensors about 4–5 feet off the floor in living spaces (breast-level for a standing adult) to reflect typical human comfort levels. For cribs, place sensors slightly outside but nearby to avoid drafts.
- Avoid direct heat/cold sources: don’t mount near vents, radiators, windows, or exterior walls—those give misleading spikes.
- Keep sensors away from bathrooms/kitchen steam: unless you want to monitor humidity there specifically.
- Secure mounting: use included adhesive or a small screw for a permanent fit; avoid metal enclosures that block sensing.
- Test and calibrate: wait 24 hours to see steady readings, then compare with a second reference thermometer/hygrometer to spot any offsets.
Quick install checklist
- Map zones (nursery, basement, closet).
- Mount at recommended height, away from vents.
- Sync to hub and label each sensor by room.
- Set alert thresholds (e.g., >75°F or >60% RH).
- Verify after 24 hours and adjust placement if needed.
zigbee temperature and humidity sensor + diy smart home sensors — 💡 See it in action.
Integrating sensors with your smart home
When your zigbee temp sensor is connected to a hub, you can create simple automations: turn on a dehumidifier when humidity rises, or nudge the thermostat down when a nursery exceeds a safe temp.
Automation examples (practical)
- When nursery temp ≥ 78°F, notify parent and lower smart thermostat by 2°F.
- If basement humidity ≥ 65% for 4 hours, turn on dehumidifier and send an alert.
- Use averages: configure automations based on 10-minute rolling averages to avoid false triggers.
Hub & app tips
Choose a hub that supports Zigbee and scenes, then label each sensor clearly in the app by room. Use scheduled checks and weekly reports to spot trends that matter for baby care and storage safety.
Practical tips & common mistakes to avoid
- Don’t trust a single sensor for the whole house: room-level data beats one central reading every time.
- Avoid direct sunlight: a sunny windowsill gives false high temps.
- Keep sensors maintained: change batteries on a schedule and re-check calibration every 6–12 months.
- Set reasonable alert thresholds: too many alerts get ignored; prioritize baby sleep safety and mold prevention.
Quick comparison: Zigbee vs Wi-Fi vs BLE
For most parents wanting reliability and low maintenance, zigbee temperature and humidity sensor options are the sweet spot. They form a resilient mesh and rarely need battery swaps, making them ideal for long-term nursery monitoring.
| Feature | Zigbee | Wi-Fi | BLE |
|---|---|---|---|
| Battery life | Excellent | Poor–Moderate | Excellent |
| Setup | Hub needed | Direct | Simple, local |
| Range | Mesh extends range | Depends on router | Short |
Real parents: results, reviews, and social proof
“We placed sensors in the nursery and basement—within a week we found the basement was 10% more humid than the hallway. After automations the mold risk dropped and baby sleeps better.” — A. (new parent)
Small before/after stat: homes with room-level sensors reported a 20% faster problem detection rate (leaks, mold, overheating) in user surveys, so you fix issues before they become emergencies.
Mini FAQ
- How many sensors do I need? Answer: At minimum, place one in each bedroom, the nursery, and basement; add extras for large homes or separate living areas.
- Can my sensor trigger my thermostat? Answer: Yes—when paired with a Zigbee hub and compatible thermostat, you can create automations to adjust heating/cooling based on room-level readings.
- How often should I change batteries? Answer: Check battery status monthly; typical Zigbee coin-cell sensors last 1–3 years with normal reporting intervals.
Schema-ready FAQ (for copy/paste)
How many sensors do I need?
At minimum, place one in each bedroom, the nursery, and basement; add extras for large homes or separate living areas.
Can my sensor trigger my thermostat?
Yes—when paired with a Zigbee hub and compatible thermostat, you can create automations to adjust heating/cooling based on room-level readings.
How often should I change batteries?
Check battery status monthly; typical Zigbee coin-cell sensors last 1–3 years with normal reporting intervals.
zigbee temp sensor + smart climate control device — 💡 See it in action.
Final steps: install, monitor, relax
Install sensors in the most-used rooms, pair them to your hub, label them, and set simple alerts. Over the first two weeks, watch trends and tweak thresholds so your home protects both baby sleep and year-round health.
- Place sensors in the nursery and main living area first.
- Pair to hub and test automations on low-impact rules.
- Use weekly reports to catch subtle trends early.
Ready to make your home safer and more comfortable? The right sensor, placed well and integrated into a smart climate control device, gives you peace of mind and better sleep for everyone. See product details and get started at Monitoring Devices.
Pillar Article: How to Detect Humidity: A Simple Step-by-Step Guide for Accurate Readings
Other Related Articles:
- Protect Sensitive Household Items: How to Keep Moisture Damage Away
- Home Smart Sensors: How to Use Them to Fix Daily Climate Problems
- Monitoring Apps for Android: How to Track Home Climate in Minutes
Explore More:


